Question
How to I move the myQA database to a new SQL Server?
Answer
To avoid data loss, it is necessary to transfer the existing myQA database(s) from the existing SQL Server instance over to the replacement SQL Server.
Step 1
Begin by launching Microsoft SQL Server Management Studio, and right-click on the database to backup and follow the steps as shown below.

Step 2
After clicking Back Up... ensure the file destination (highlighted in blue below) is noted as this file will need to be copied over to the machine hosting the new SQL Server. Click OK to complete the backup.

Repeat the above steps for any additional databases prior to proceeding. For the final portion of this step, transfer the backup files over to the new machine.
Step 3
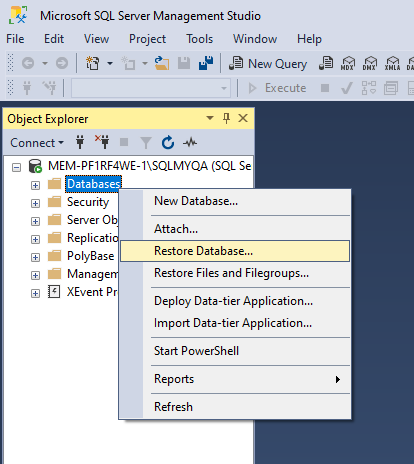
Launch Microsoft SQL Server Management Studio on the new machine. Right-click on Databases, then Restore Database...
Step 4
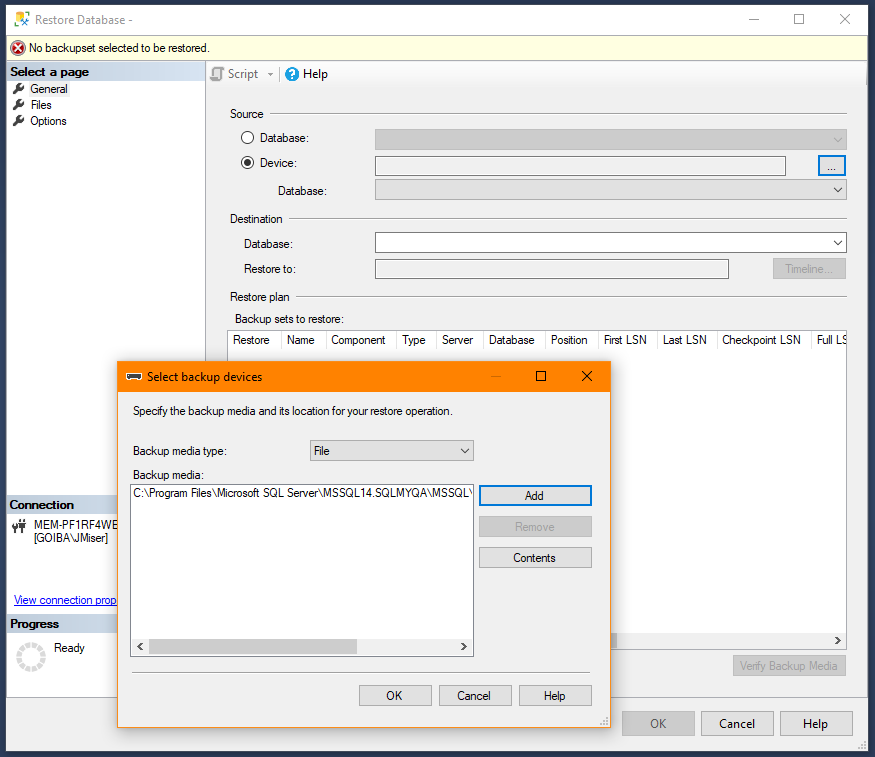
Choose the Device option and click on the ... button (highlighted in blue) to the right. In the popup shown below, point the software to the location of the backup file previously created, and click OK.
Step 5
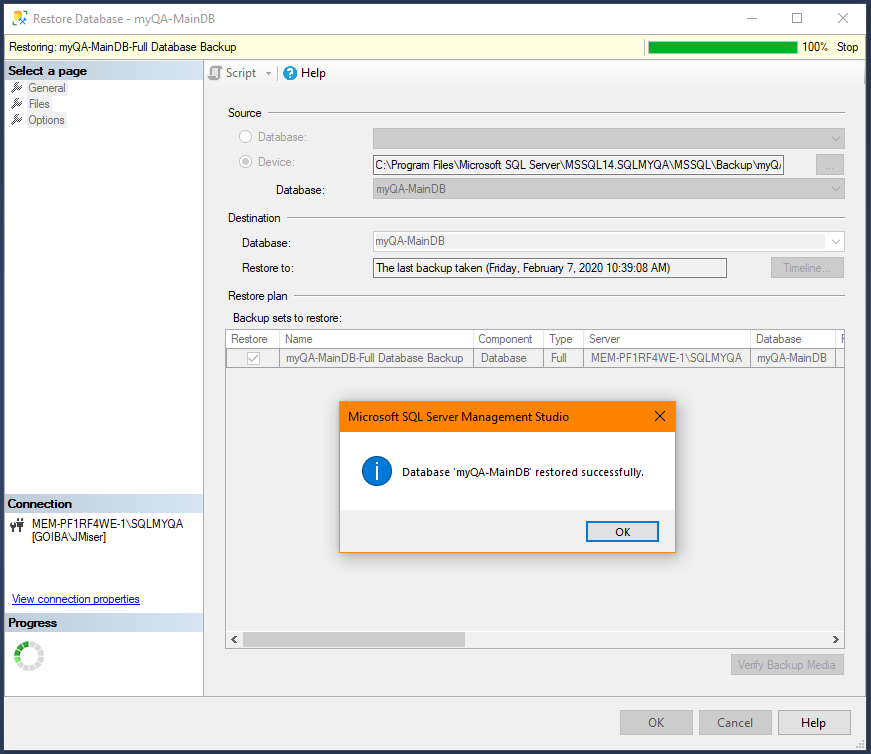
Once the database has completed the restore process, you should see the following screen. Simply click OK. Repeat this process for any remaining databases.
Step 6
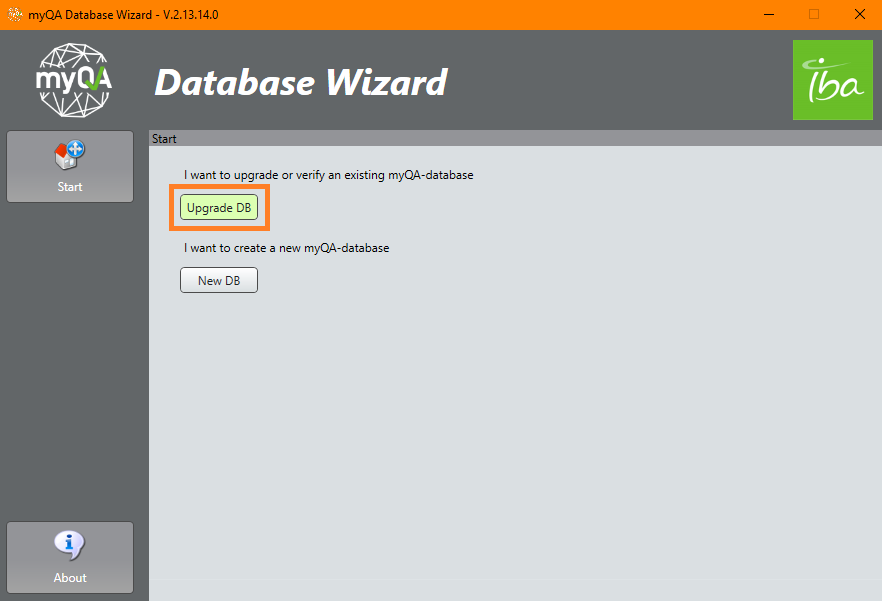
Once all databases have been restored successfully, myQA will need to be pointed to the new database. To begin, launch the myQA Database Wizard. Once open, choose Upgrade DB
Step 7
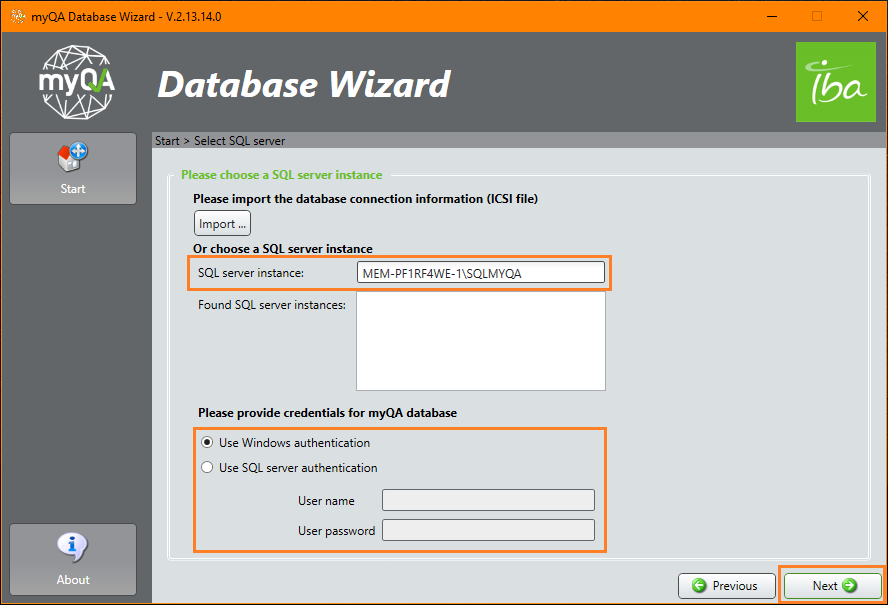
In the next window, ensure the SQL server instance: is pointing to the new SQL Server instance. Then select the proper credentials and choose Next. ***Depending on the IT settings, this step may require the use of the SQL SA account.***
Step 8
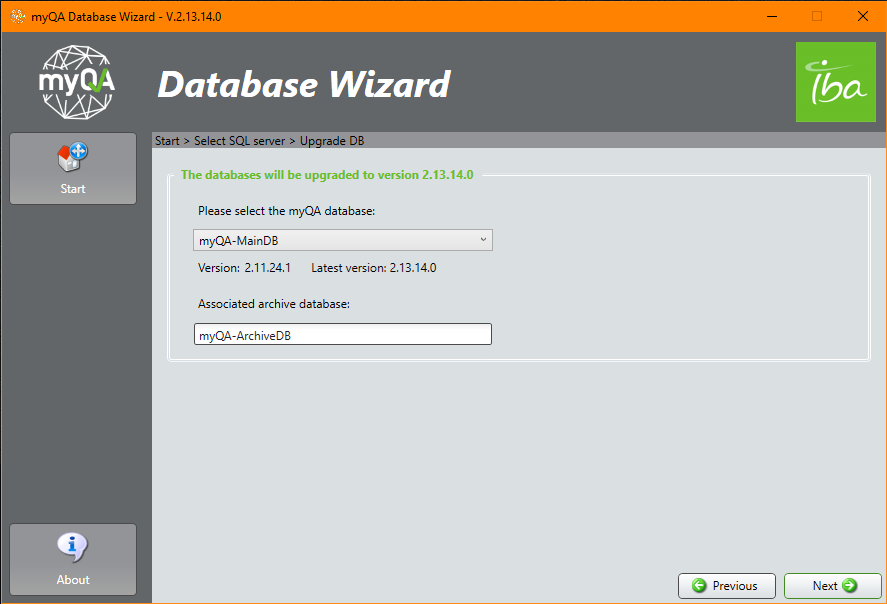
In the next screen, ensure the correct myQA database is selected for both the active database as well as the archive. Lastly, click Next.
Step 9
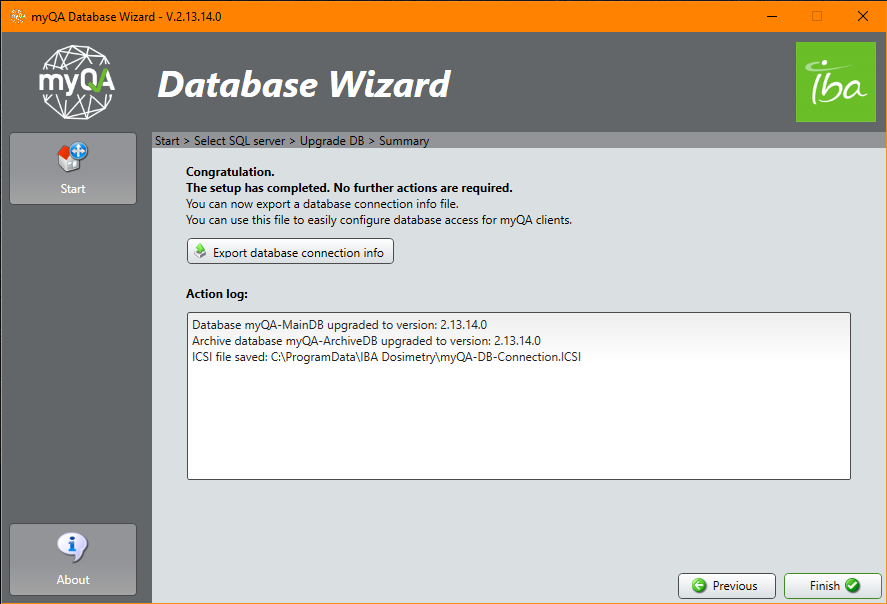
The final screen is shown below. If you have additional PCs to update, choose Export database connection info and use this file for the subsequent PCs. Lastly, click Finish.
