Question
How to setup Gantry Sensor +?
Answer
A gantry angle sensor is used for online gantry angle measurements while irradiating for dose measurements during verification of patient QA and machine QA.
GS+ is designed to be used without any cable.
Installation Steps:
1. Mounting the base on the gantry surface:
Turn the gantry to 0°; select a position on the gantry surface that is flat and parallel to the gantry rotation plane. Remove the protection foil of the adhesive tapes on the bottom of the unit. Hold the complete unit to the place where it is supposed to be fixed and view from the top of the sensor; its orientation is at 0°.
Press firmly so the base sticks on the gantry surface.
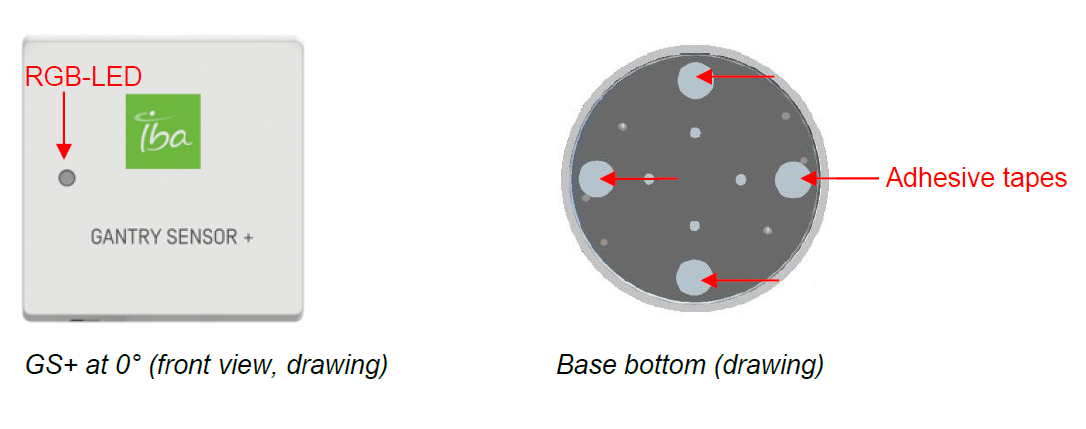
2. Mounting the sensor on the base:
Slightly press the sensor on the base and turn it until it snaps into the base.
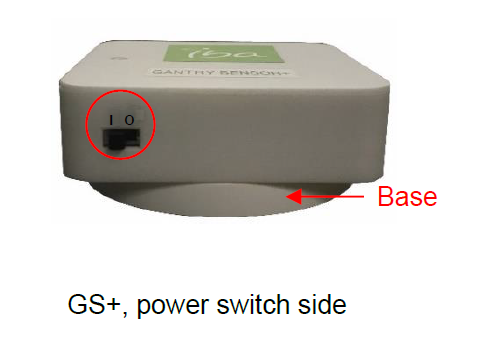
3. Initiating the sensor:
Turn on the sensor by pushing the switch to the “I” position.
4. Add the device:
In the Windows 10 Start menu, open Bluetooth & other devices Settings, and then turn on the Bluetooth.
4. Connecting the sensor to the myQA application:
In the myQA application, open myQA Patients / myQA FastTrack > Measurement ribbon> select the MatriXX Resolution device and Connect> Click the Angle sensor icon (Bluetooth Angle Sensor Selection and Setup dialog open)>click the Select button(the selected device will be displayed in the box on the right side)
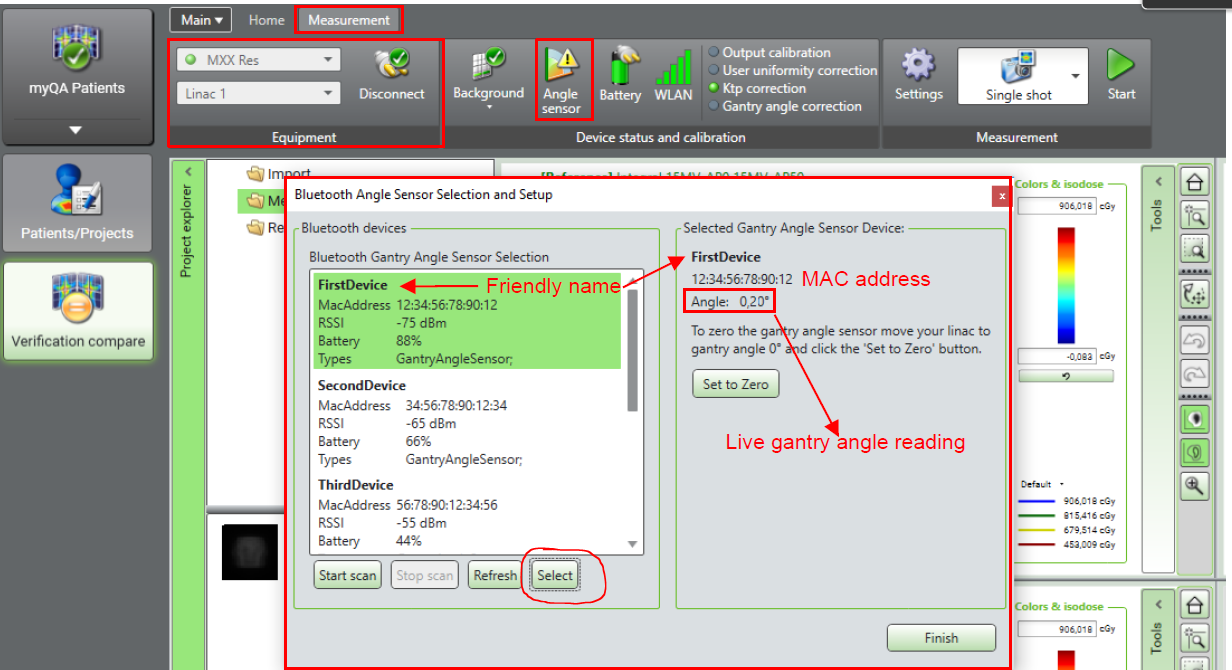
Set the gantry at 0° and Click the Set to the Zero button and lastly Finish.
Note: If the gantry angle reading displayed “NaN”, please wait for about 1 min until the sensor display a number, i.e., the device is ready.